Today, I am going to show you how to upgrade Citrix XenApp from 7.15 LTSR to Virtual Apps 7 1912 LTSR.
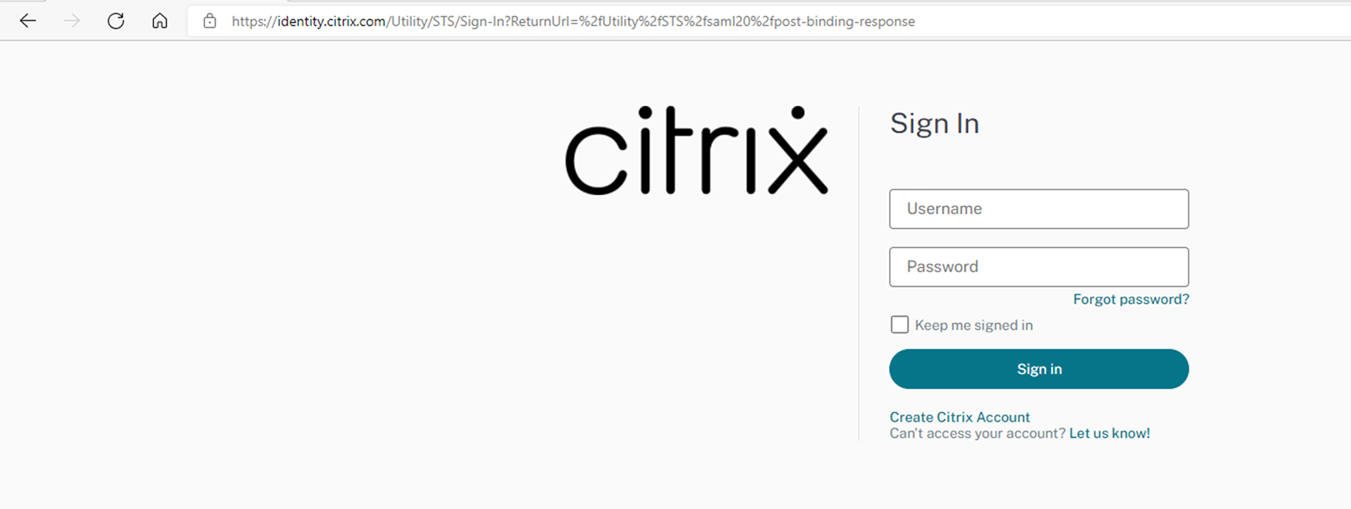
1.Sign in your Citrix account from citrix.com.
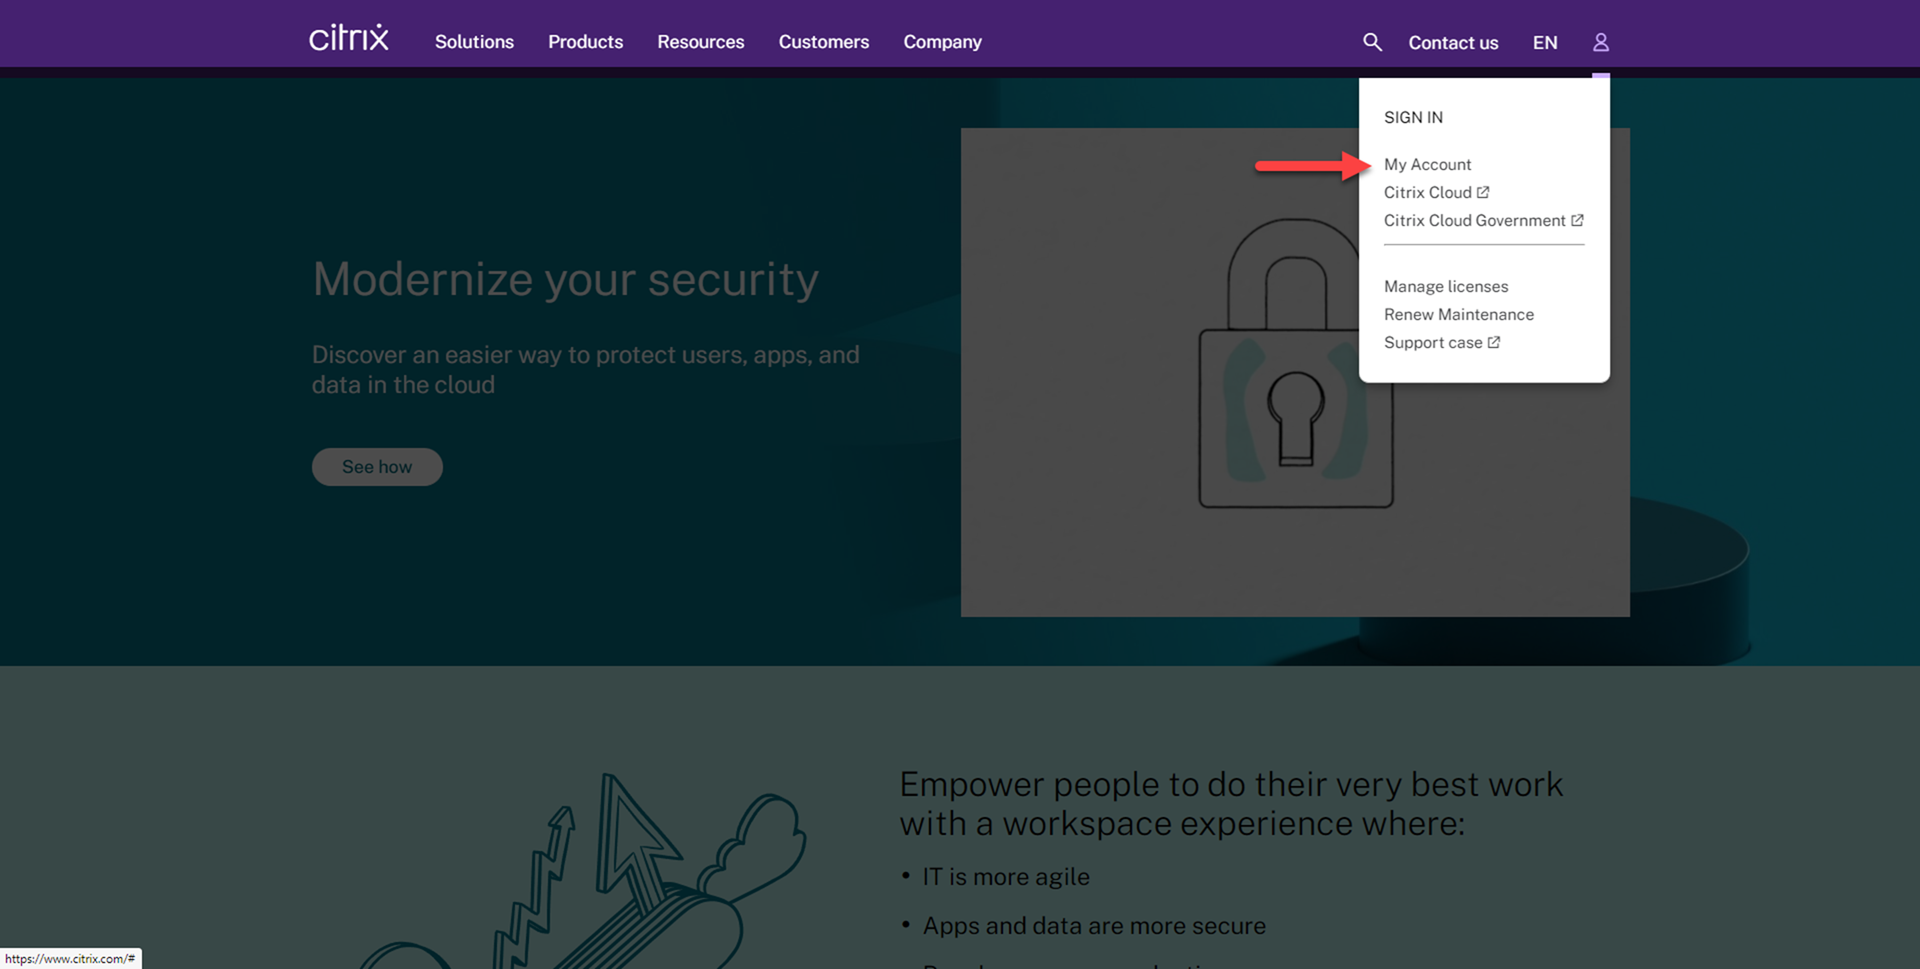
2. Enter your user name and password, click Sign in.
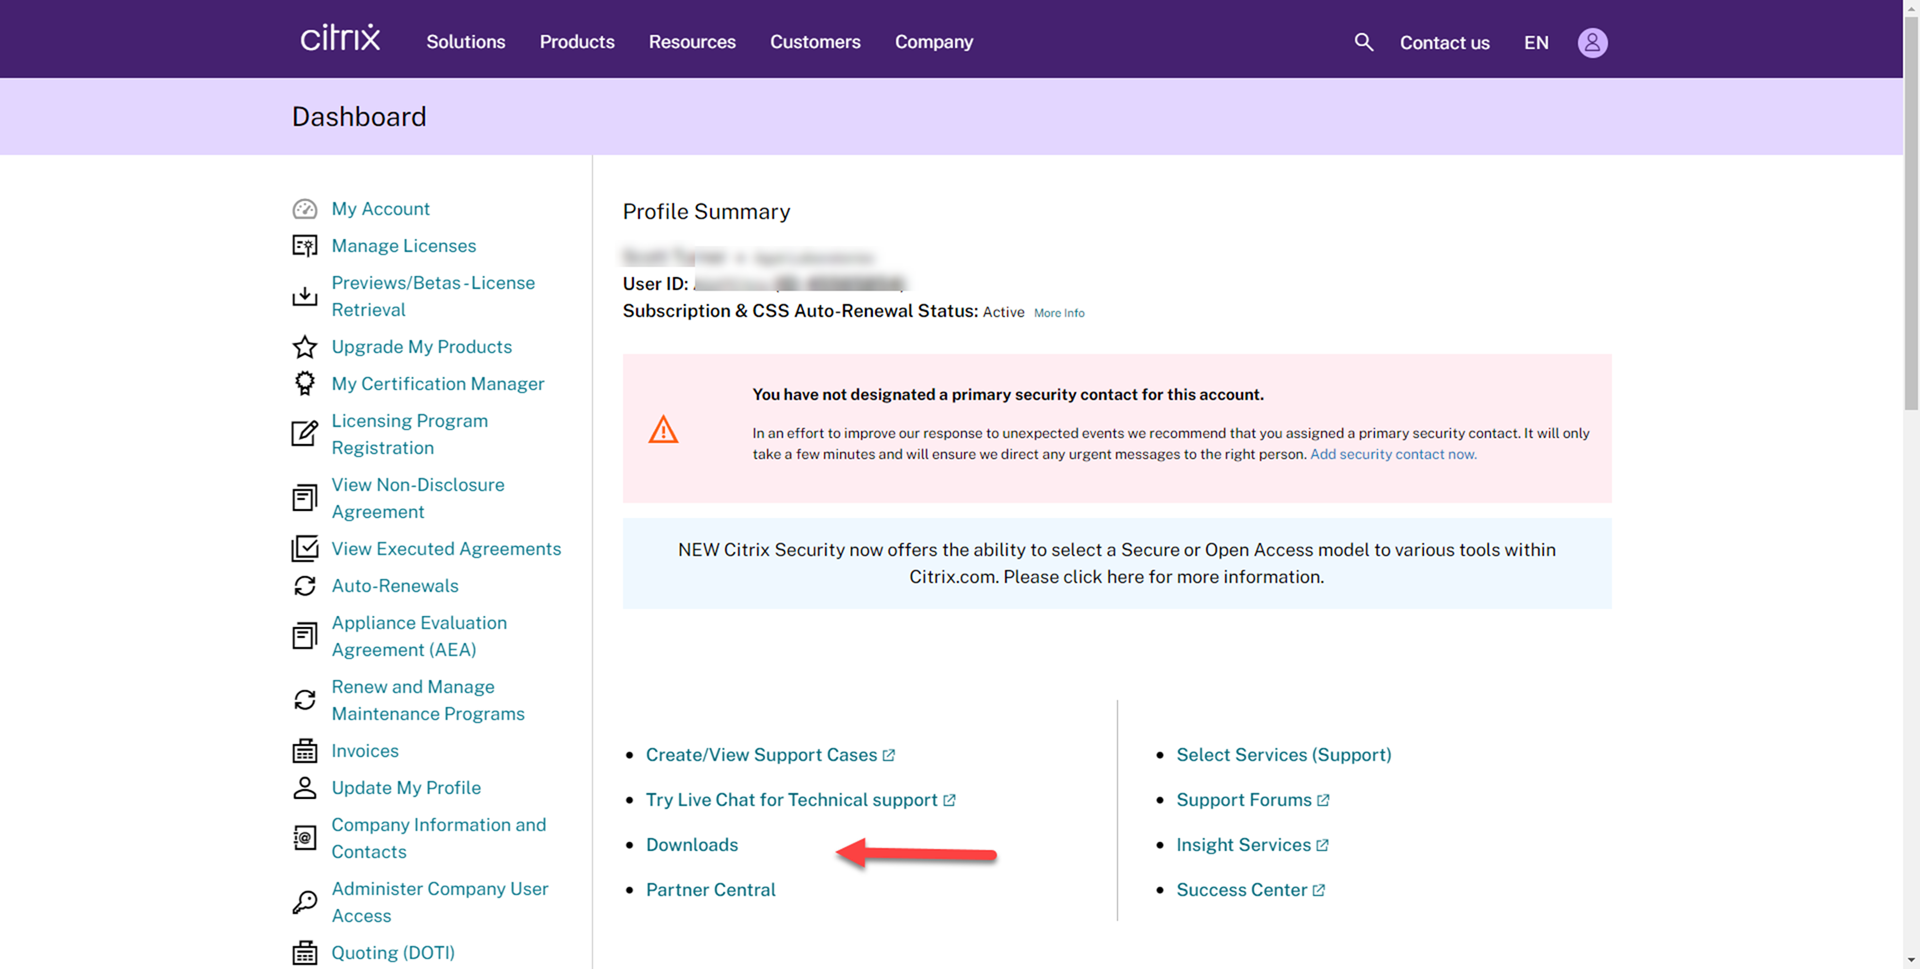
3. On the Dashboard page, select Downloads.
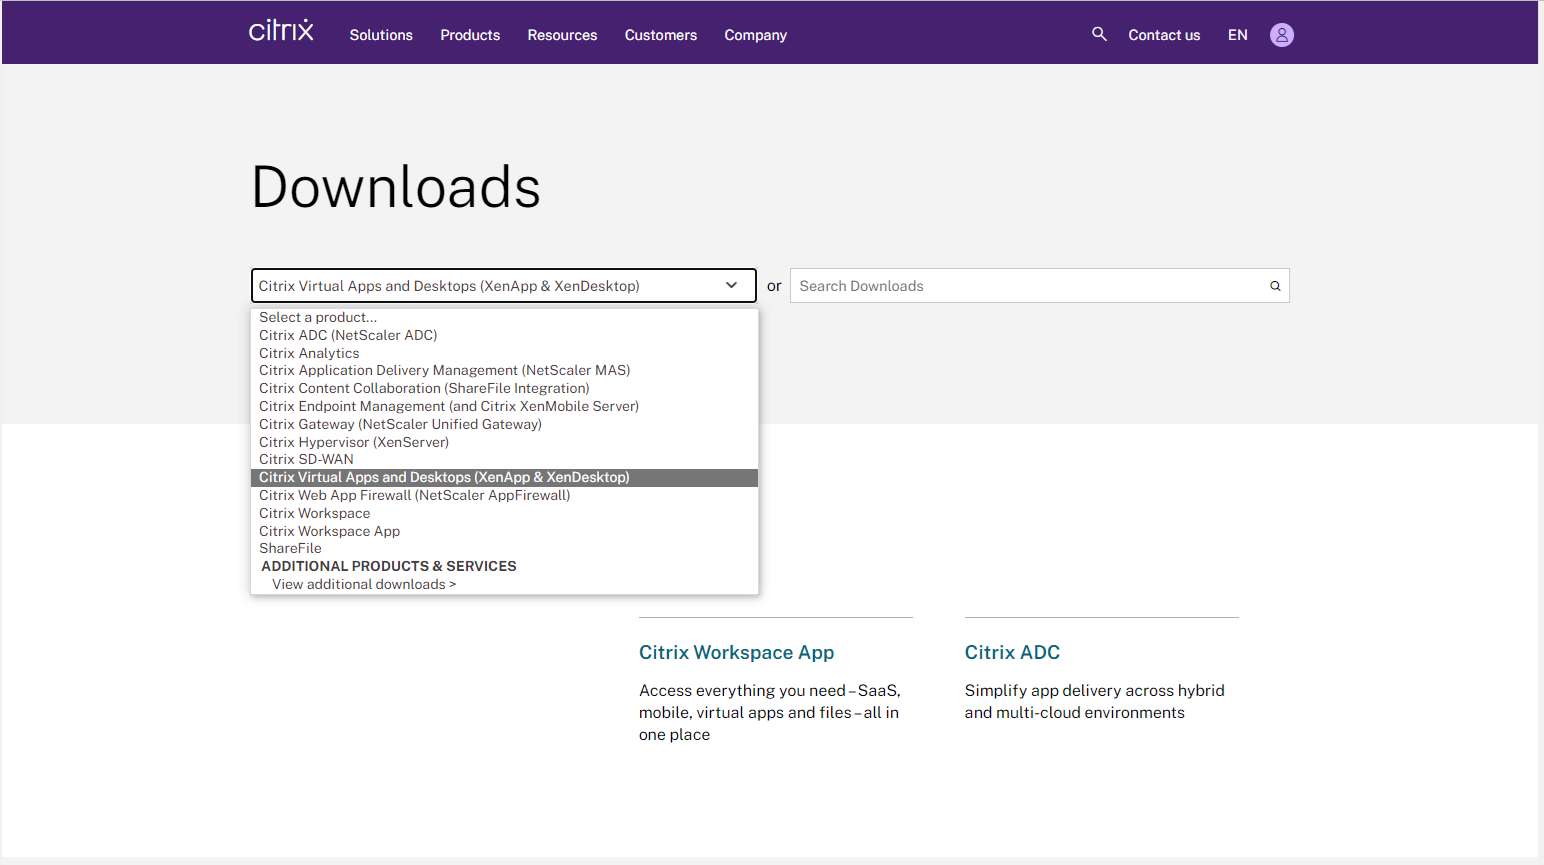
4. On the Download page, select Citrix Virtual Apps and Desktops (XenApp & XenDesktop).
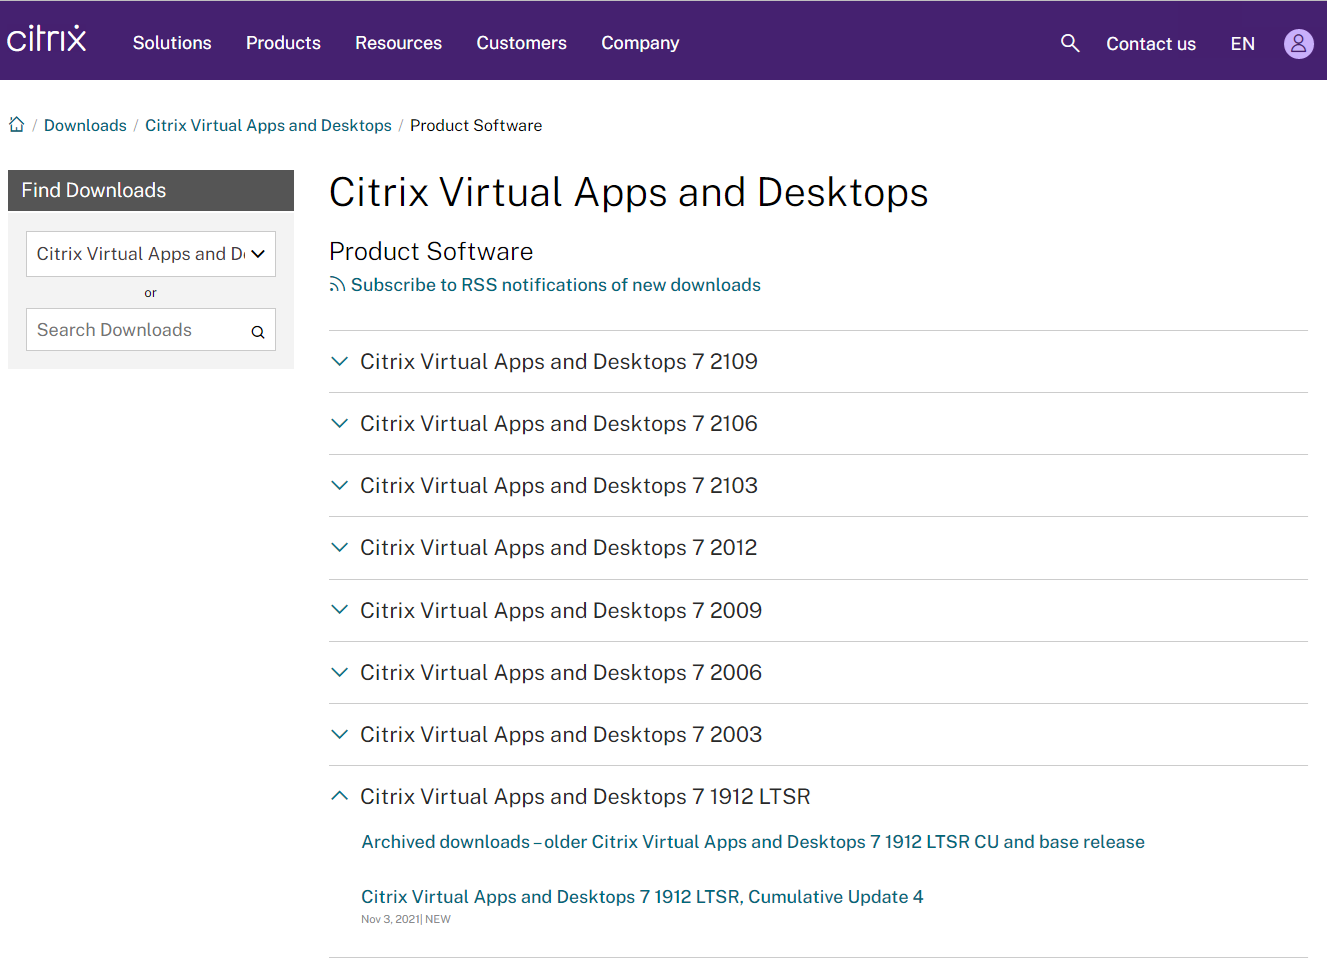
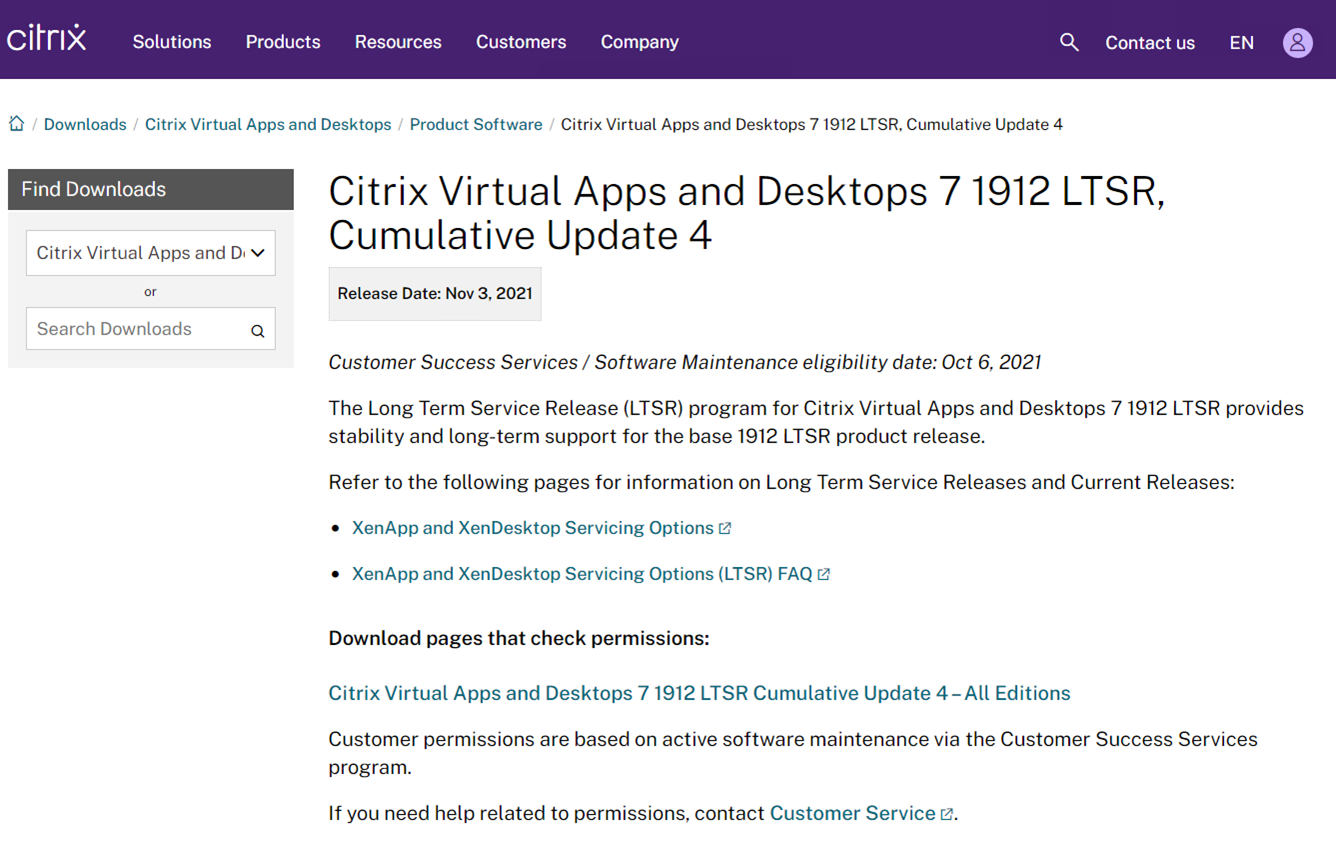
5. On Citrix Virtual Apps and Desktops (XenApp & XenDesktop) page, select Citrix Virtual Apps and Desktops 7 1912 LTSR, select Product Software, click Citrix Virtual Apps and Desktops 7 1912 LTSR, Cumulative Update 4.
6. On the Citrix Virtual Apps and Desktops 7 1912 LTSR, Cumulative Update 4 page, click Citrix Virtual Apps and Desktops 7 1912 LTSR, Cumulative Update 4-All Editions.
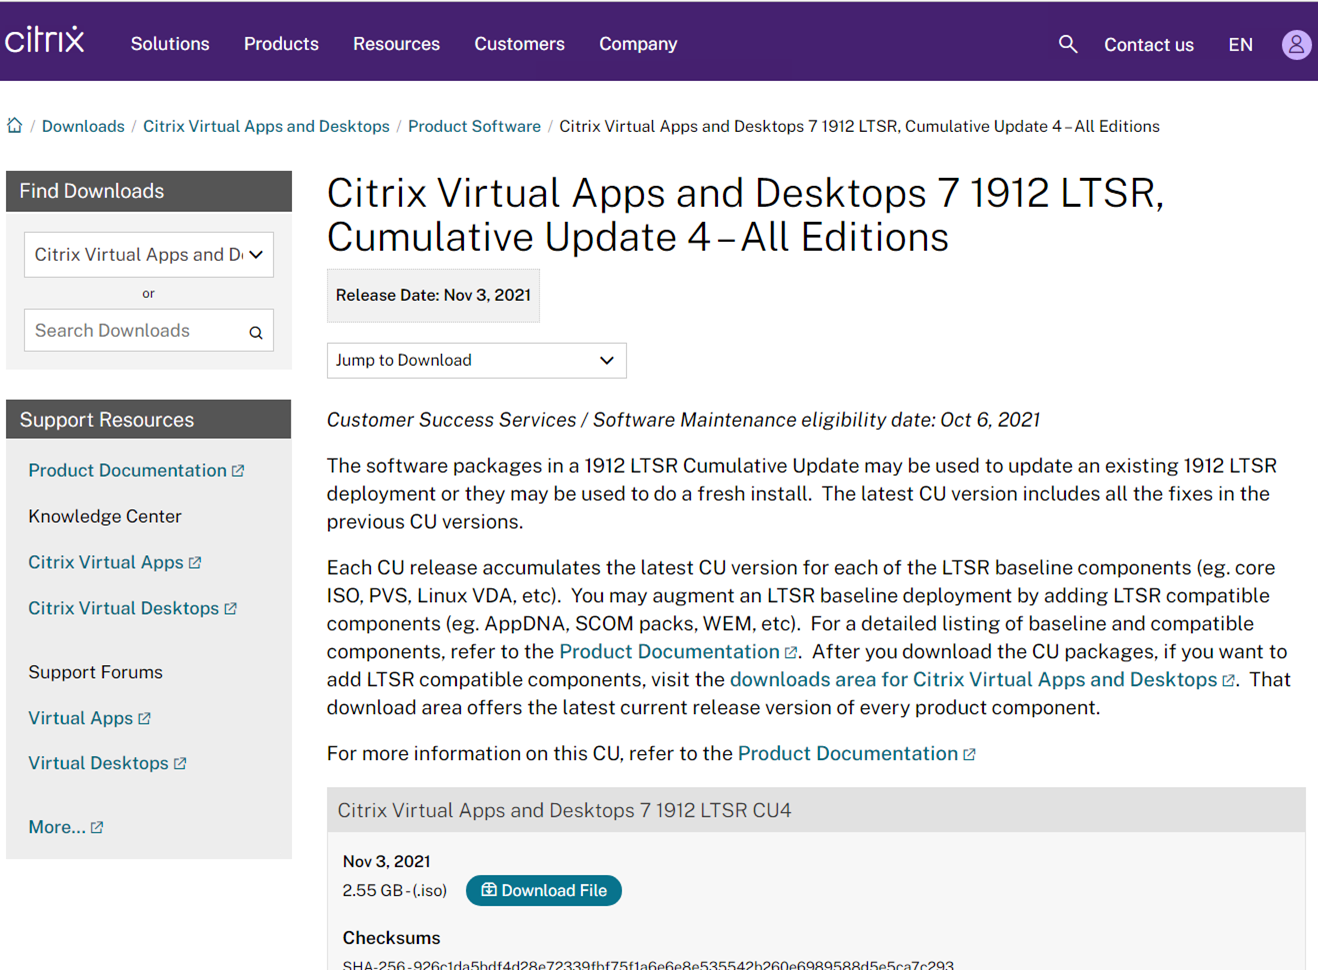
7. On the Citrix Virtual Apps and Desktops 7 1912 LTSR, Cumulative Update 4-All Editions page, , click Download File.
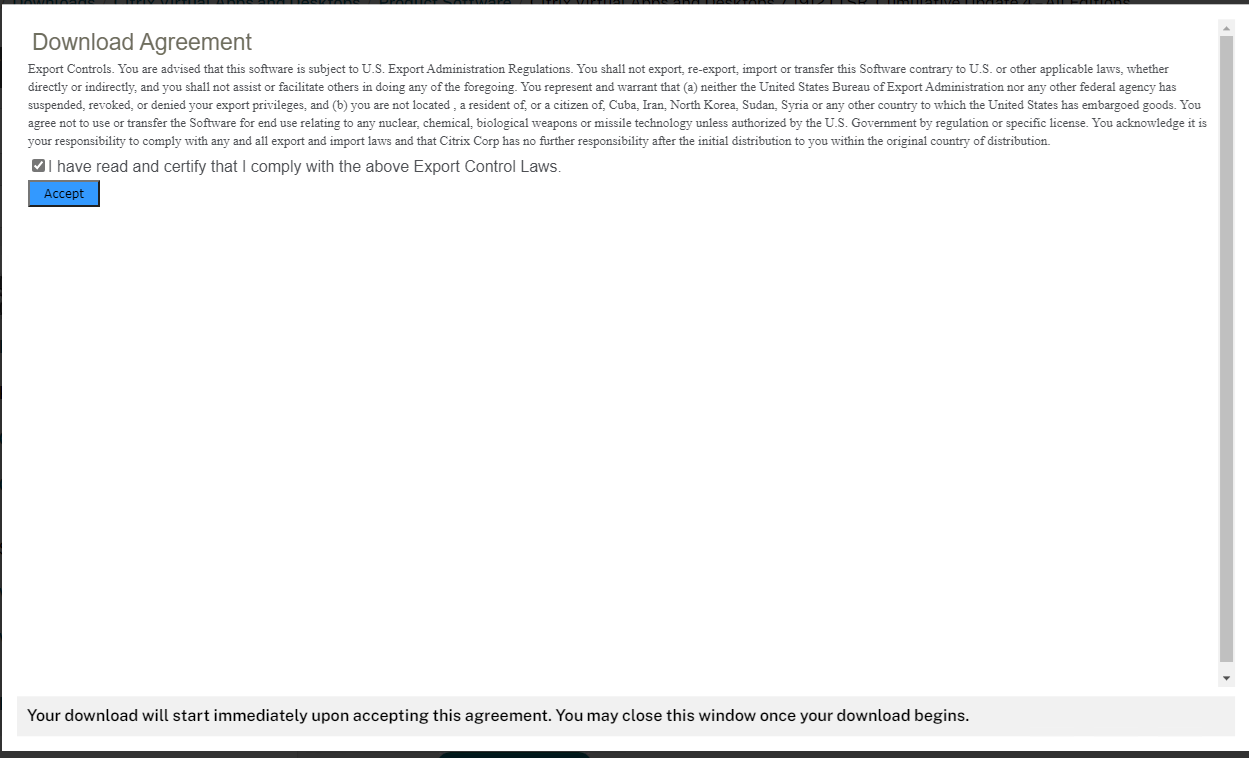
8. On the Download Agreement page, select I have read and certify that I comply with the above Export Control Laws, click Accept.
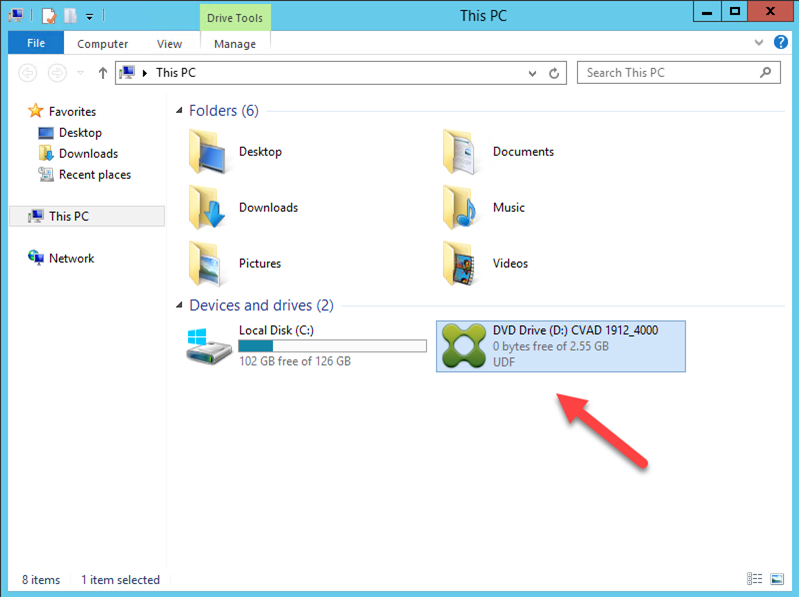
9. Save the ISO file to XenApp Delivery Controller server and Virtual Delivery Agent Server.
10. Login to XenApp Delivery Controller server.
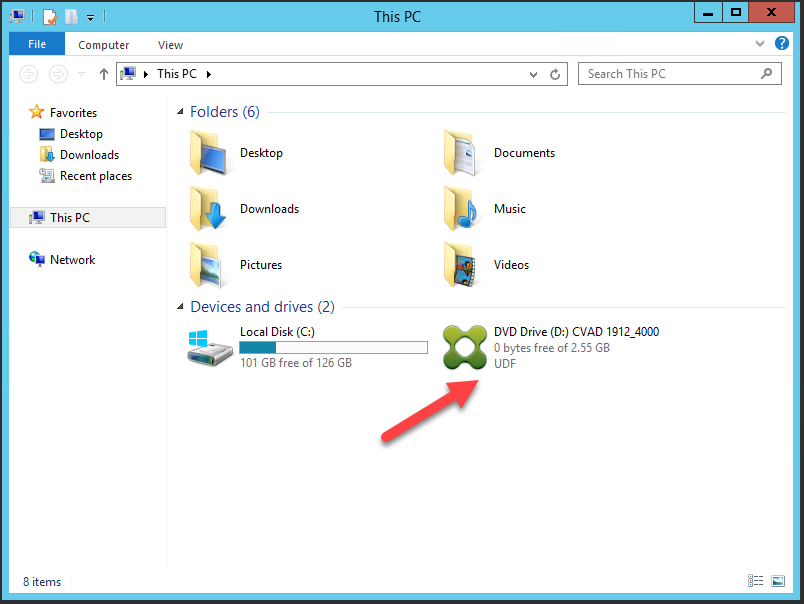
11.Mout the ISO image file.
12.Double-click DVD Drive.
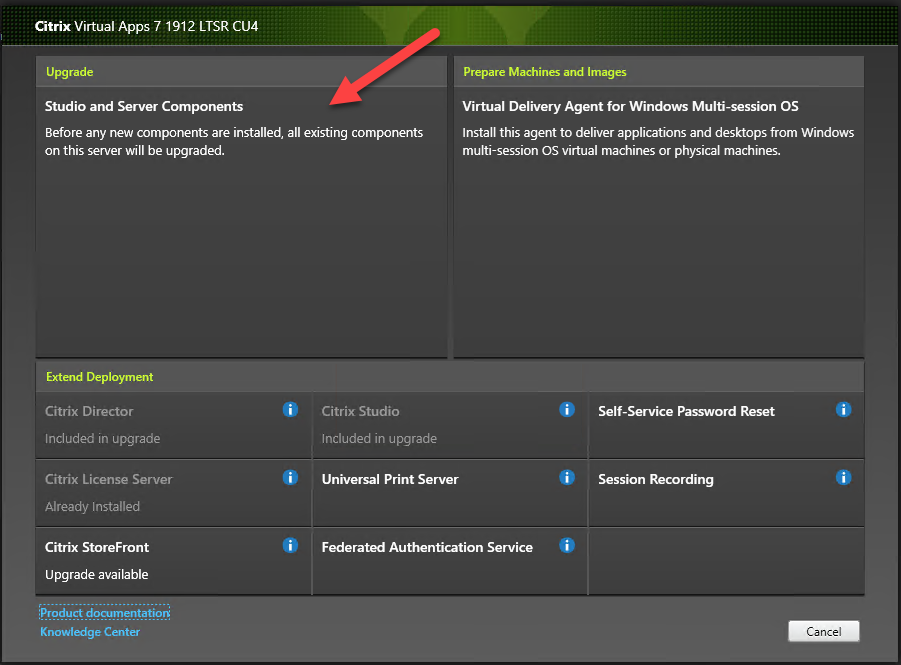
13.On the Citrix Virtual Apps 7 1912 LTSR CU4 page, click Upgrade.

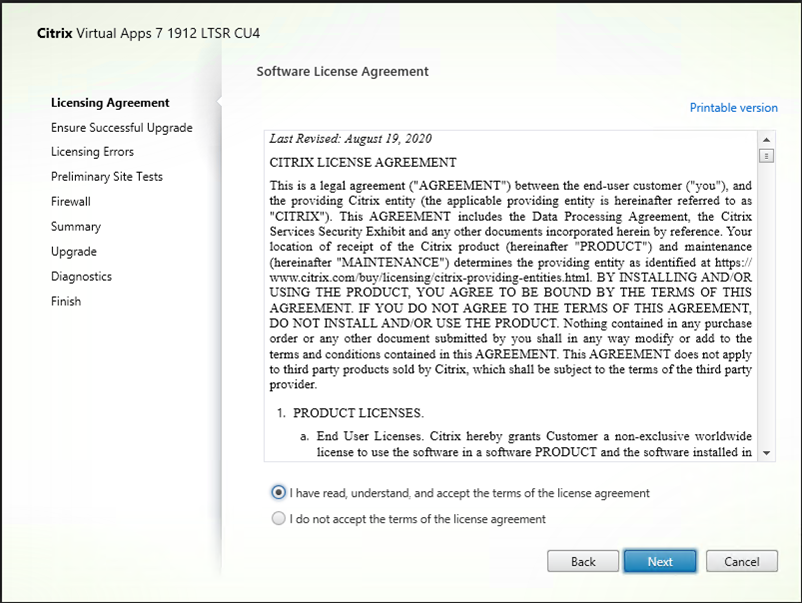
14. On the License Agreement page, select I have read, understand and accept the terms of the license agreement, click Next.
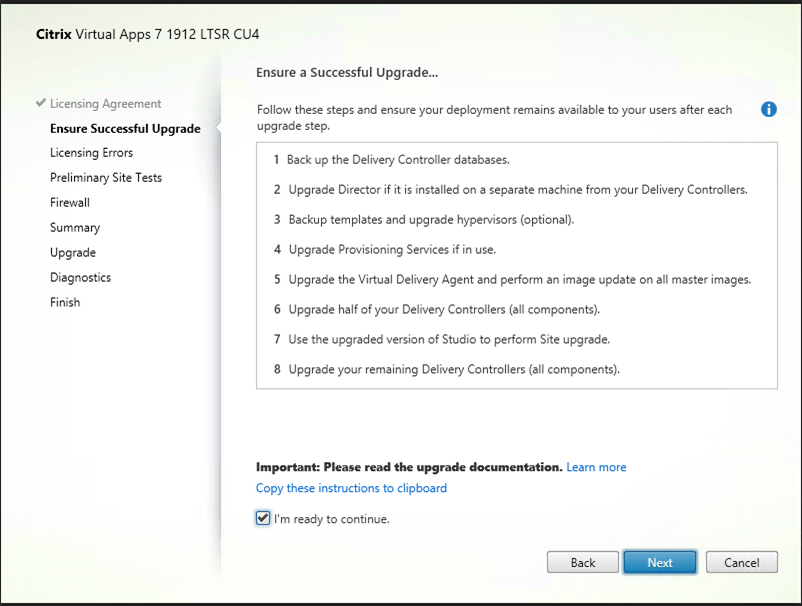
15.On the Ensure a Successful Upgrade page, select I’m ready to continue, click Next.
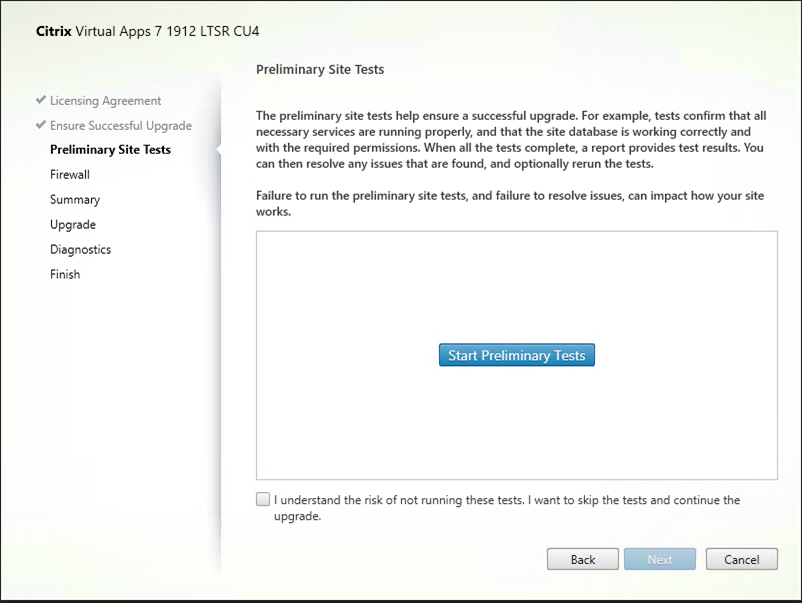
16.On the Preliminary Tests page, click Start Preliminary Tests.
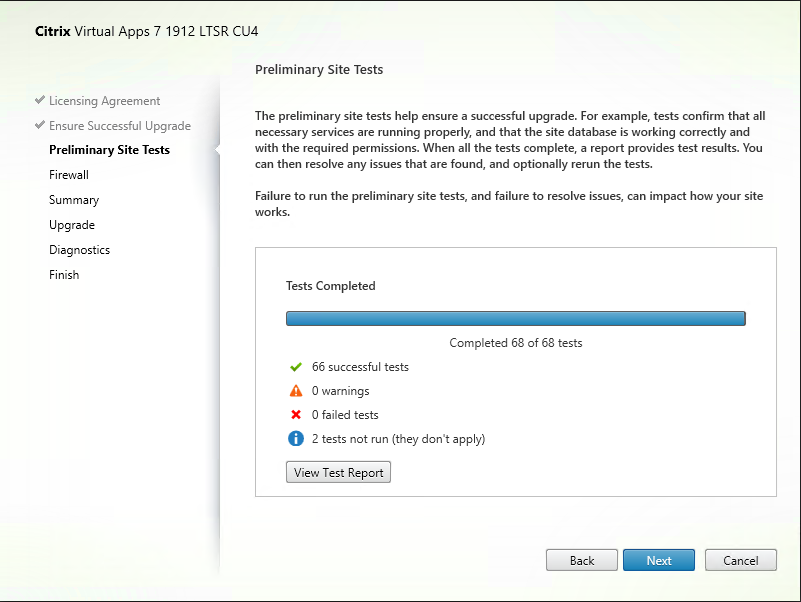
17. Click Next if there are no issues at Tests result.
18.On the Firewall page, click Automatically configure firewall rules, click Next.
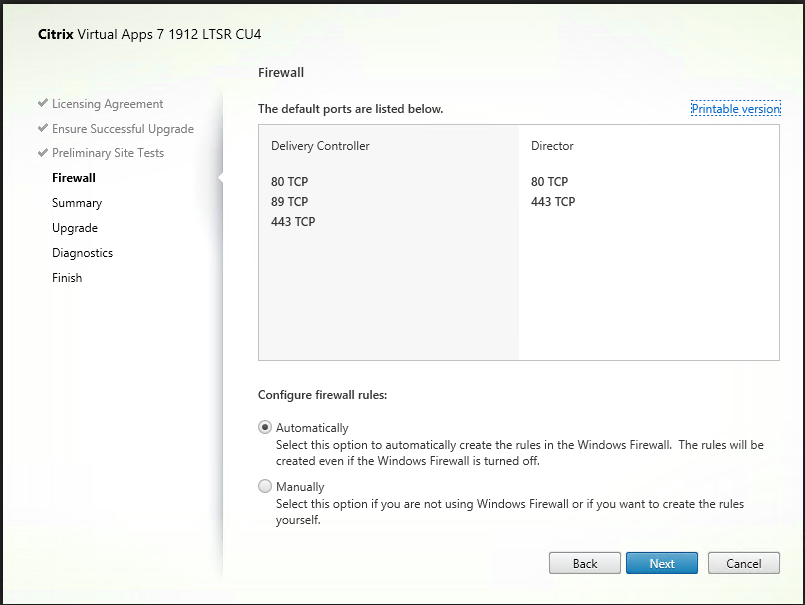
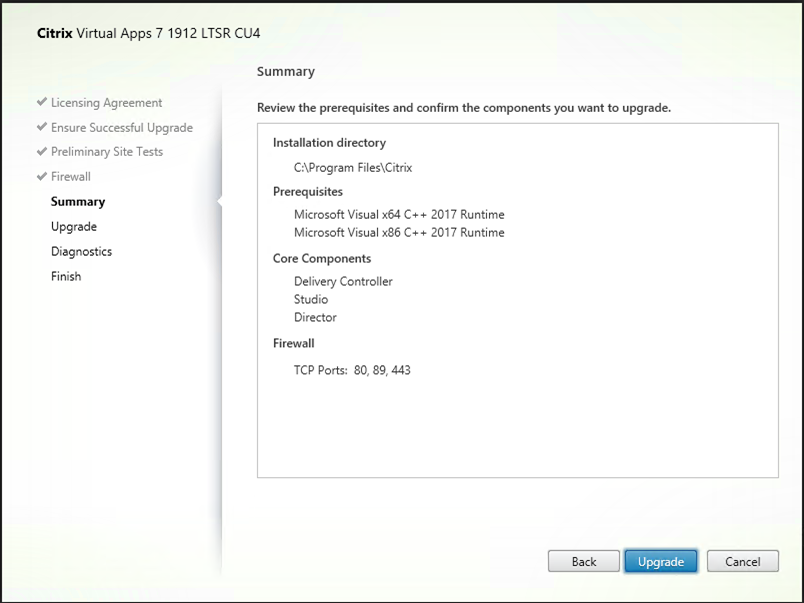
19.On the Summary page, click Upgrade.
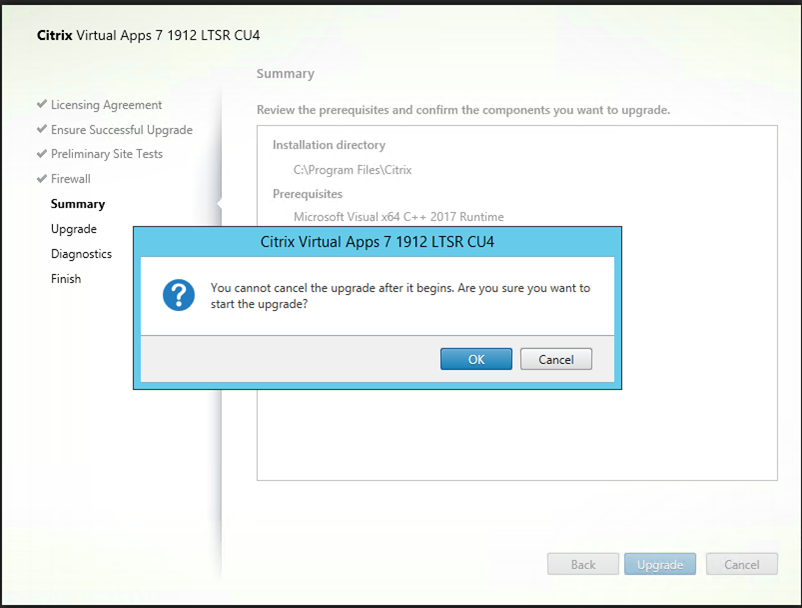
20.Click OK on the upgrade confirm page.
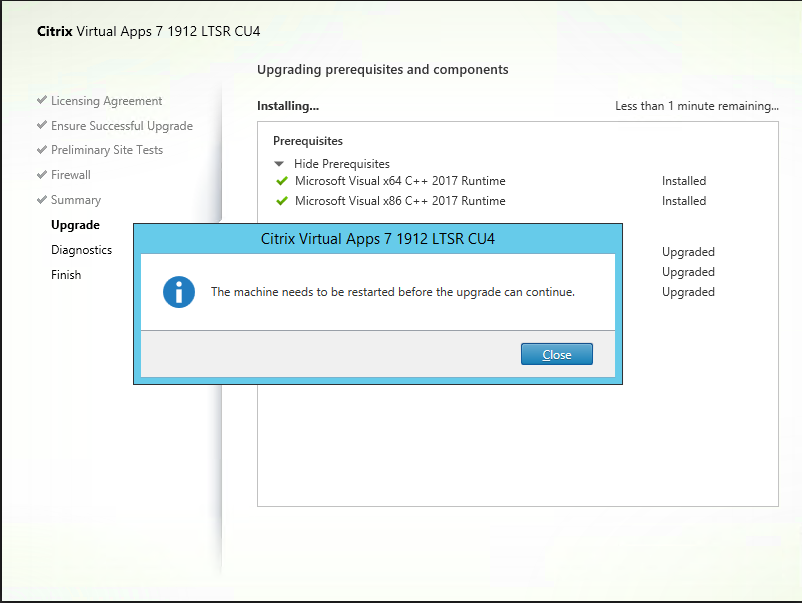
21.The server needs to restart at upgrade process.
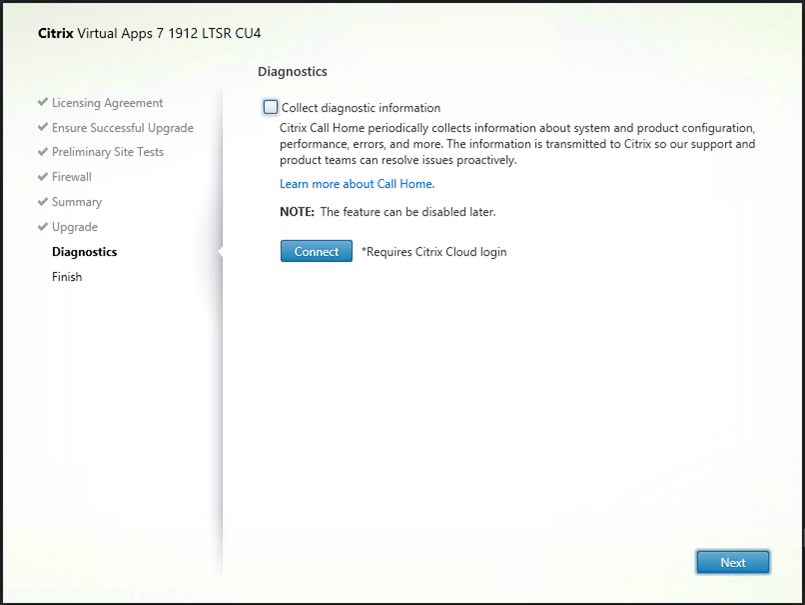
22.On the Call Home page, select I do not wat to participate in Call Home, click Next. You can participate later if need it.
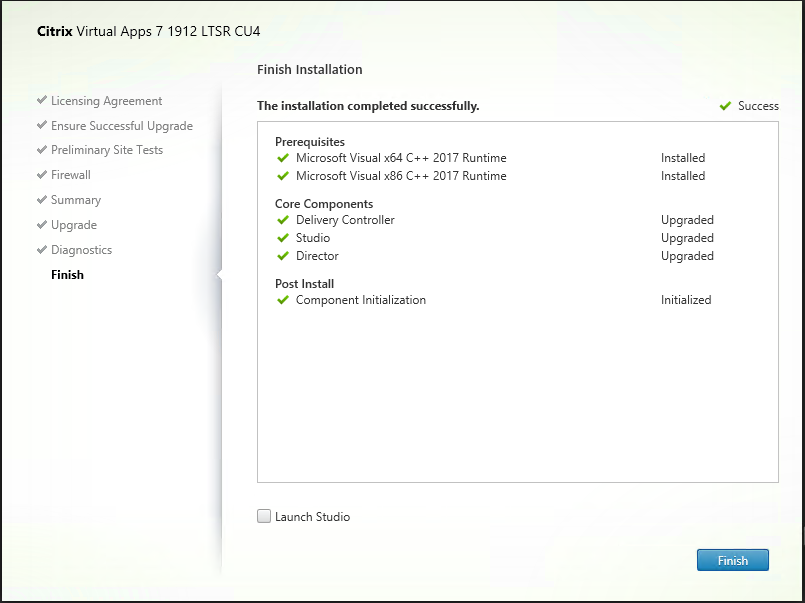
23.On the Finish Installation page, click Finish.
24.Login to XenApp VDA server.
25.Mount iso image file.
26.Double-click DVD Drive.
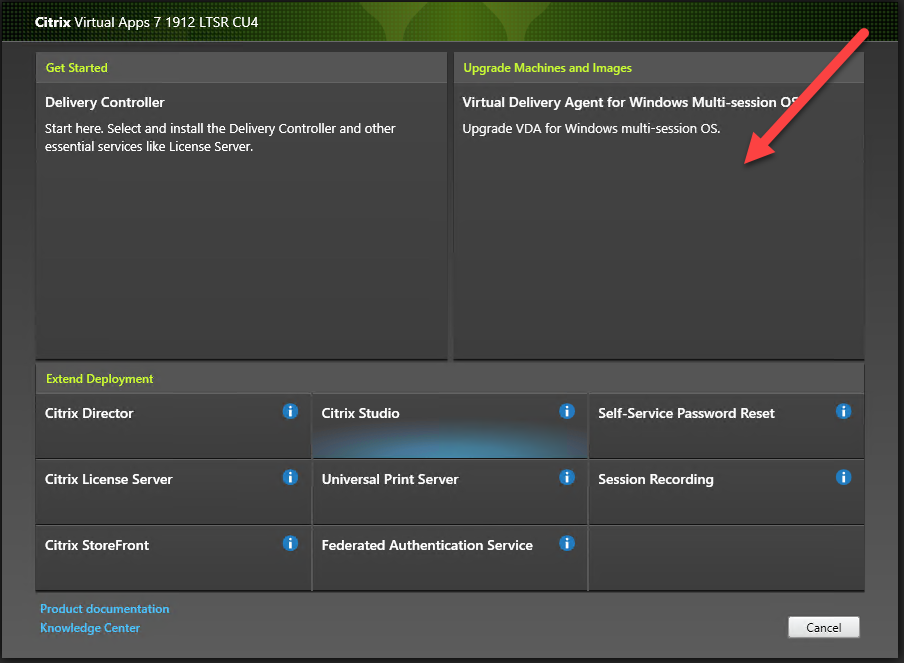
27.On the Citrix Virtual Apps 7 1912 LTSR CU4 page, click Upgrade Machines and Images.
28. If the Personal vDisk (PvD) component was ever installed on a VDA, that VDA cannot be upgraded to version 1912 LTSR or later. (This applies even if you installed PvD but never used it.) To upgrade to the new VDA version, you must manually uninstall the existing VDA and then install the new VDA.
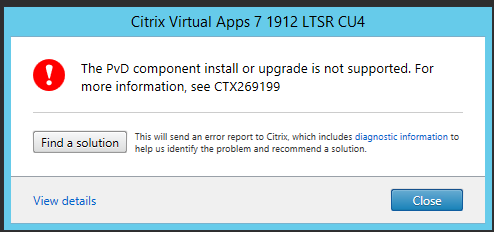
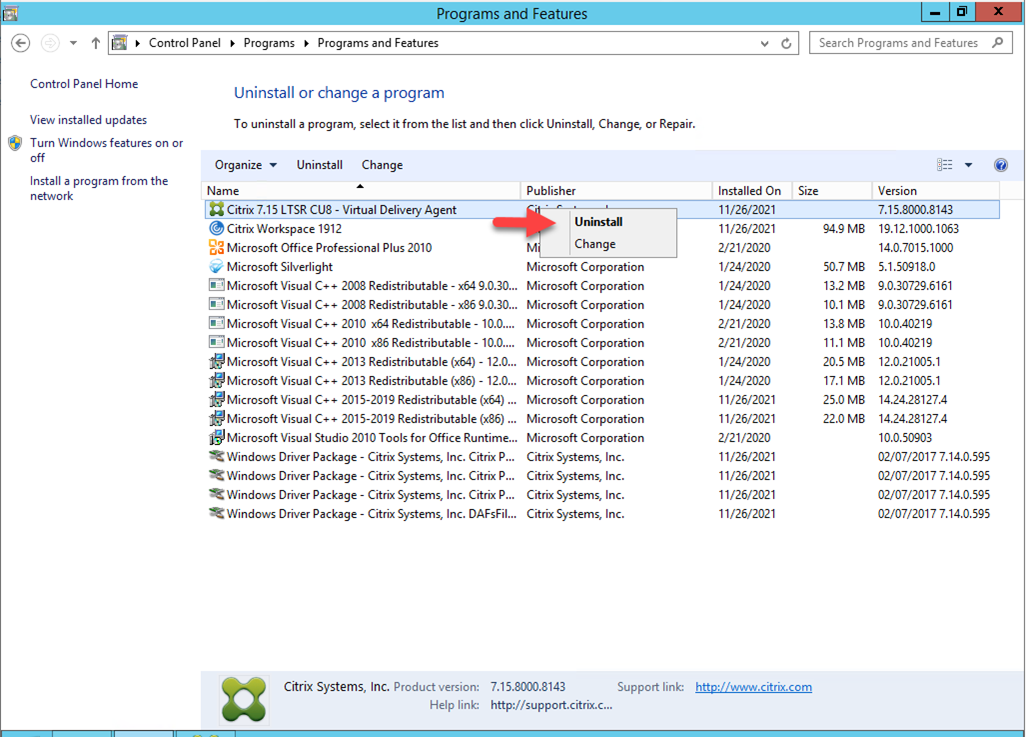
29.Open Programs and Features from Control Panel, right-click Virtual Delivery Agent and select Uninstall.
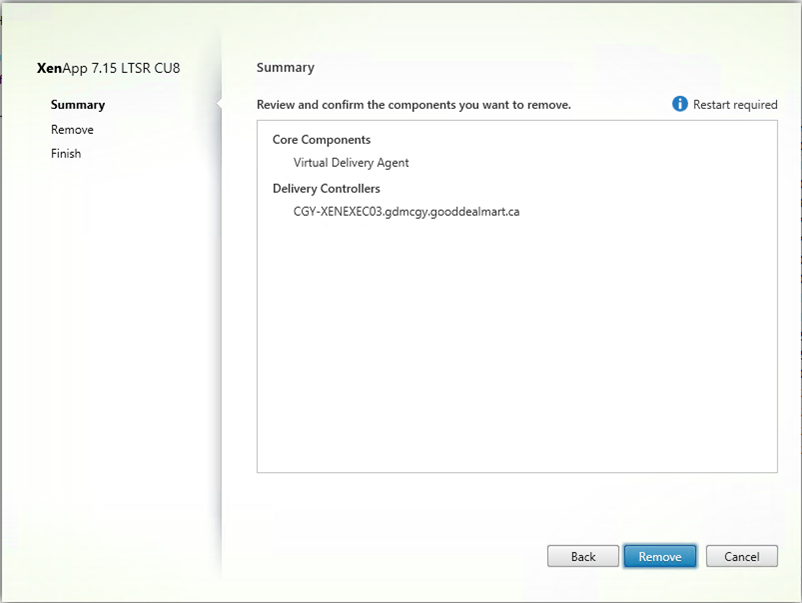
30.On the Summary page, click Remove.
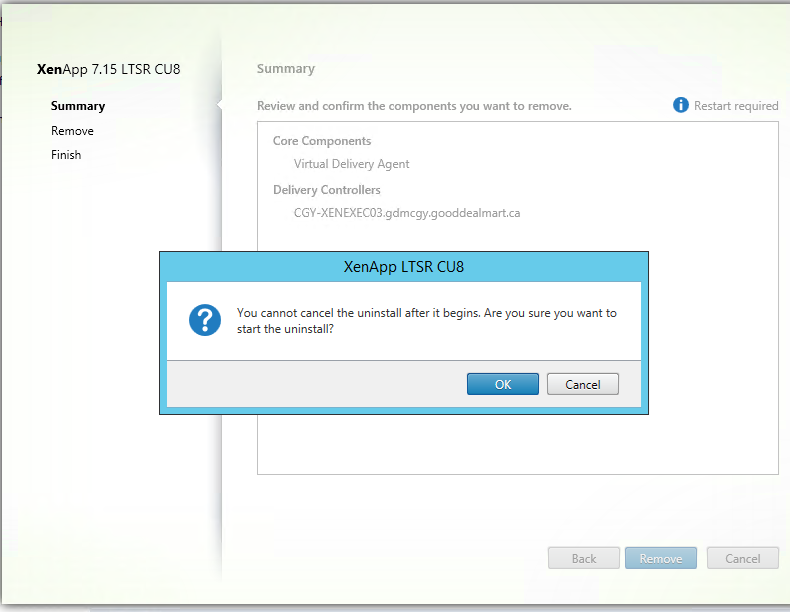
31. Click OK on the uninstall confirm page.
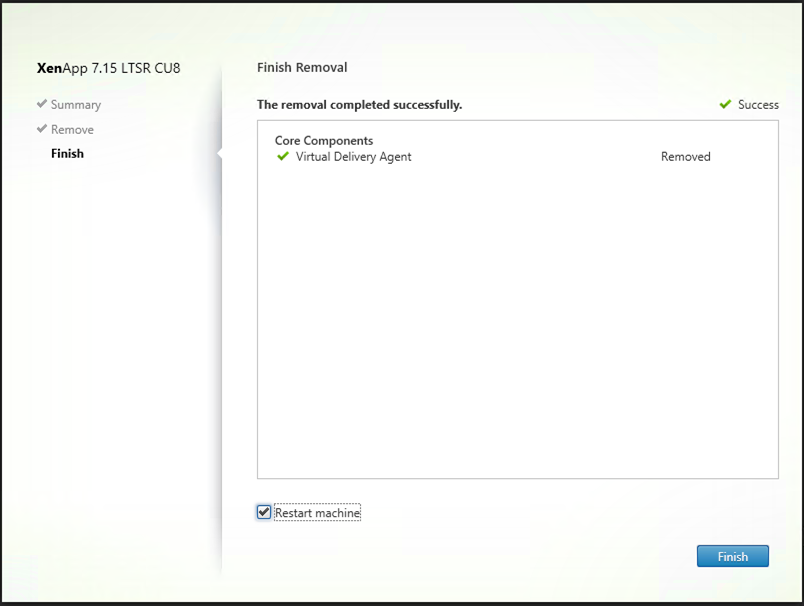
32.On the Finish Removal page, select Restart machine, click Finish.
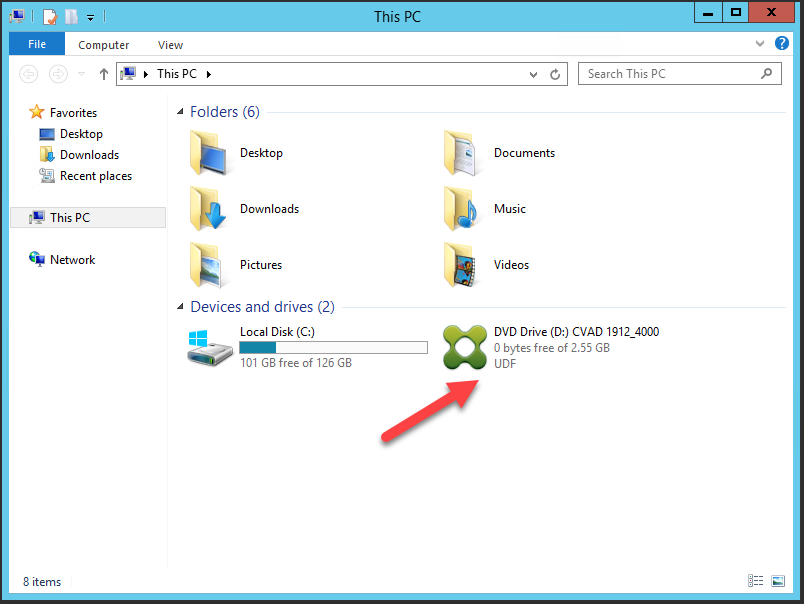
33.Click DVD Drive again.
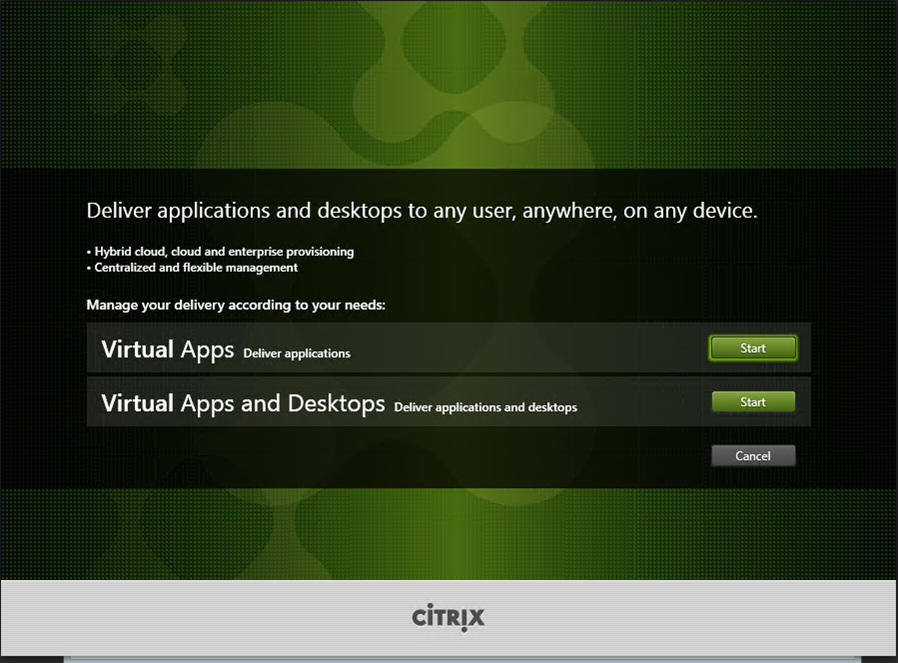
34. On the Deliver applications and desktops to any users, anywhere, on any device page, click Start at Virtual Apps Delivery application.
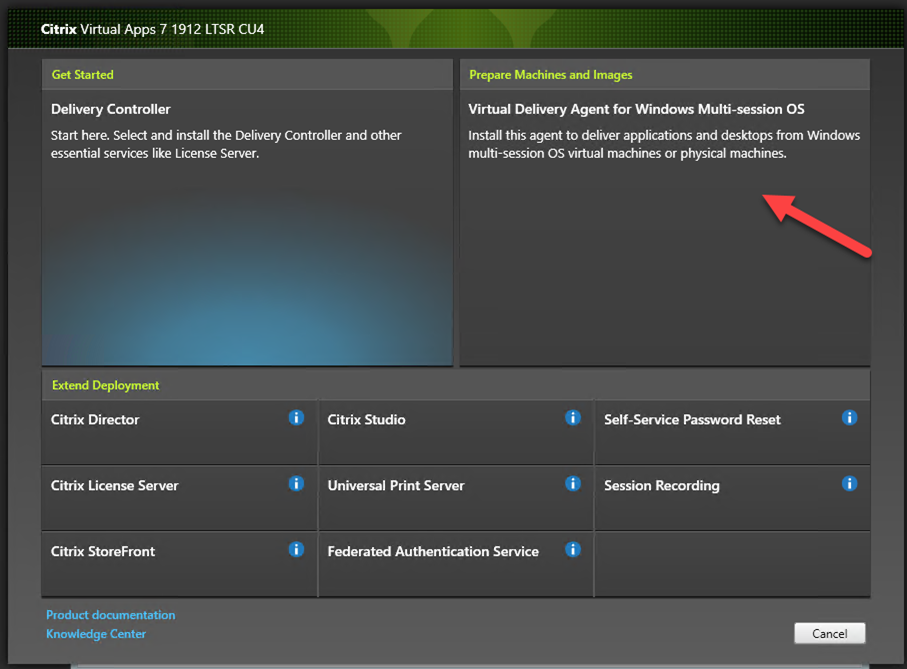
35. Select Virtual Delivery Agent for Windows Multi-session OS.
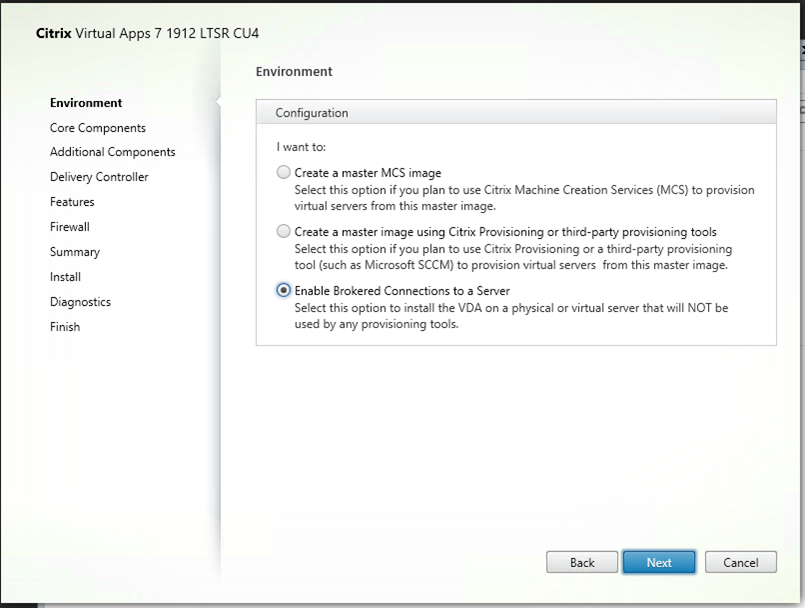
36. On the Environment page, select Enable Broker Connections to a Server, click Next.
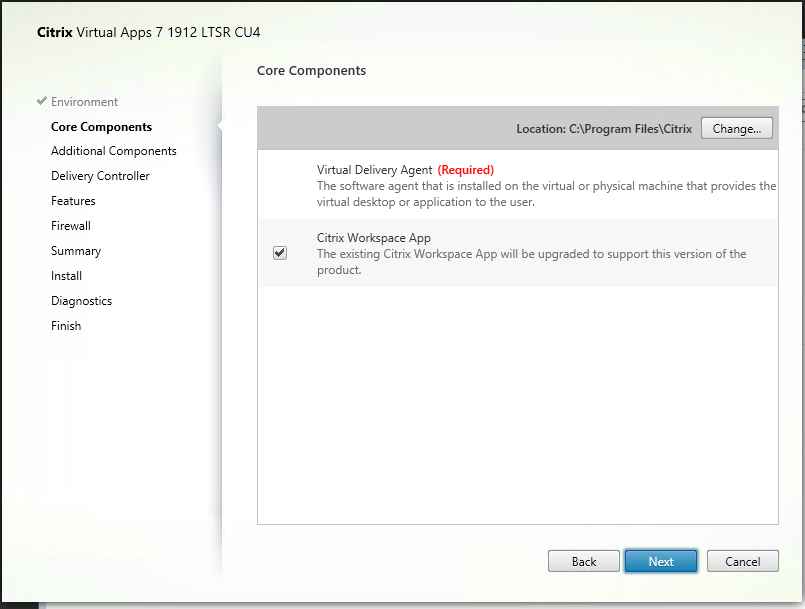
37. On the Core Components page, keep the default settings, click Next.
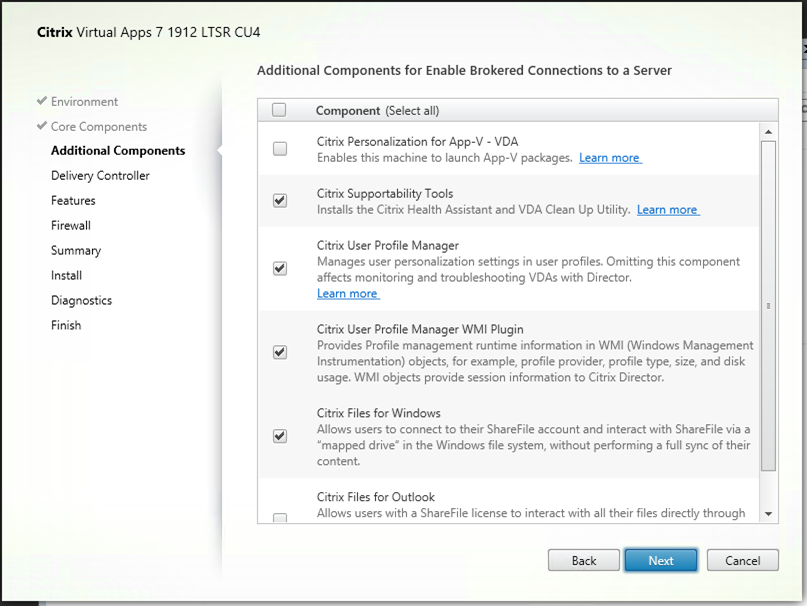
38. On the Additional Components for Enable Brokered Connections to a Server page, select Citrix Supportability Tools, Citrix User Profile Manager, Citrix User Profile Manager WMI Plugin and Citrix Files for Windows, click Next.
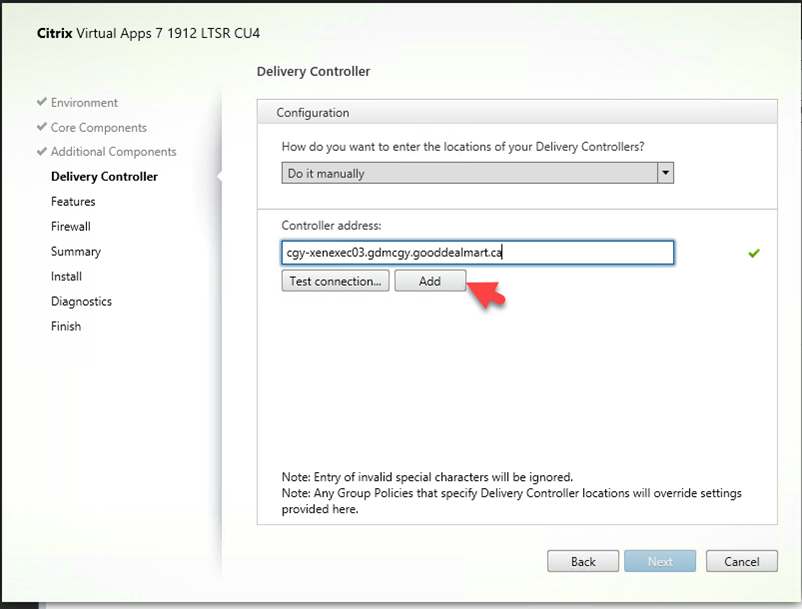
39. On the Delivery Controller page, Select Do it manually at Configuration.
40. Enter the server FQDN at Controller address, click Test connection…. In my case, the Controller address is CGY-Xenexec03.gdmcgy.gooddealmart.ca.
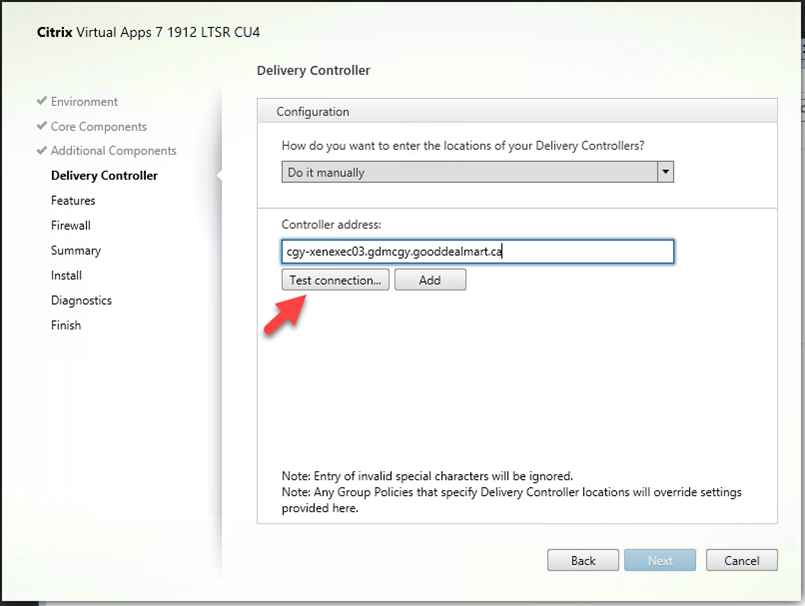
41. Make sure connection test without issues, click Add.
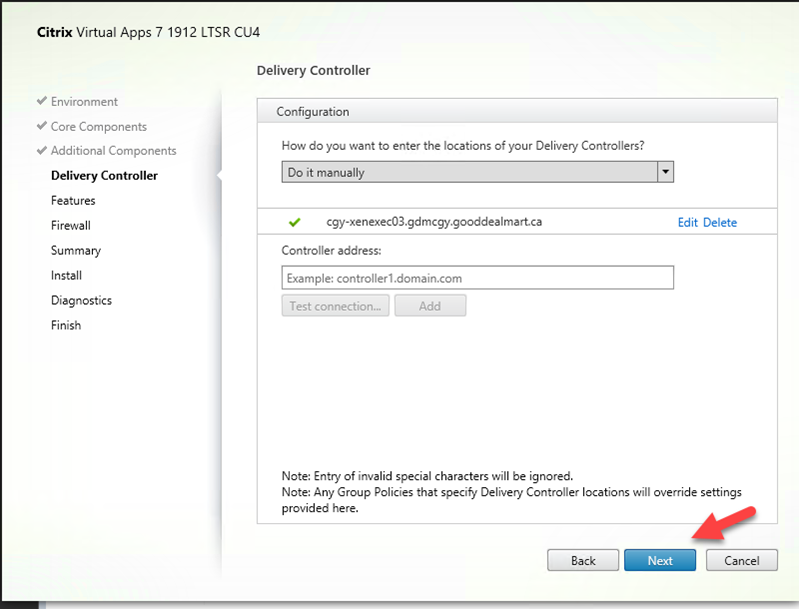
42. On the Delivery Controller page, click Next.
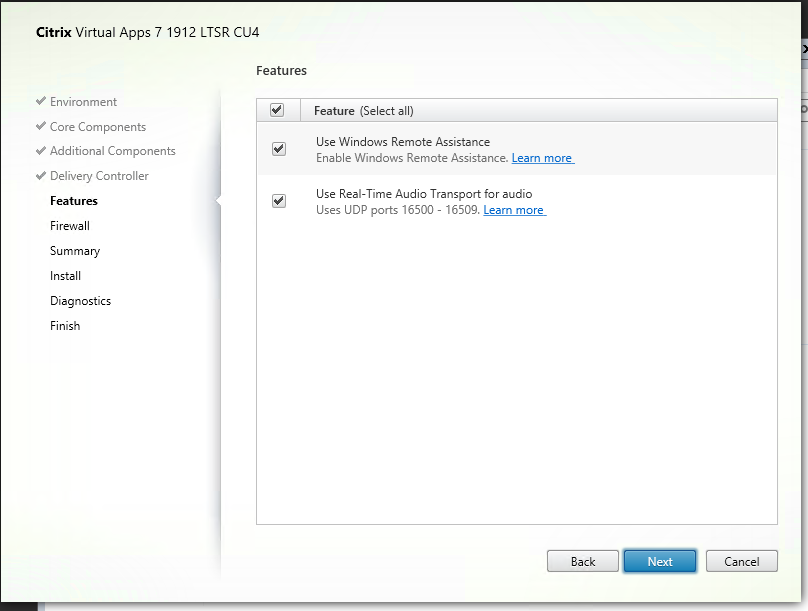
43. On the Features page, select all, click Next.
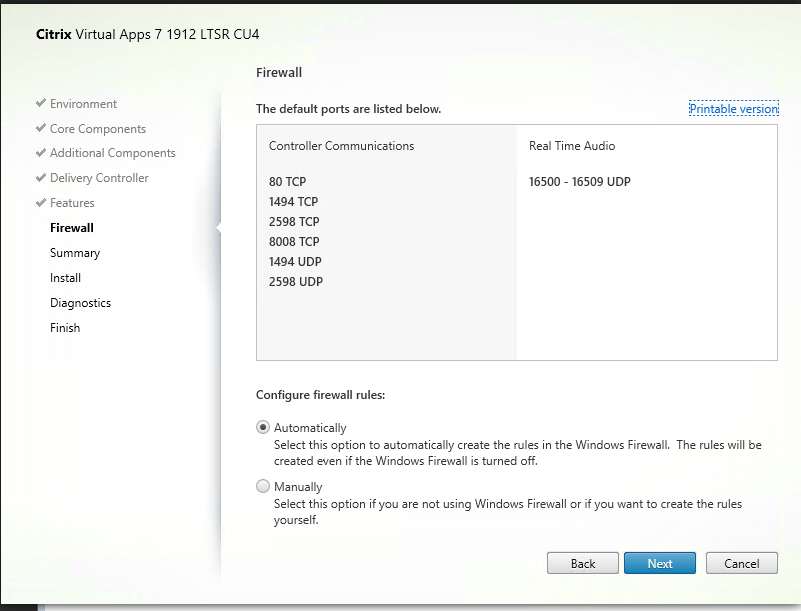
44. On the Firewall page, select Automatically to Configure firewall rules, click Next.
45. On the Summary page, click Install.
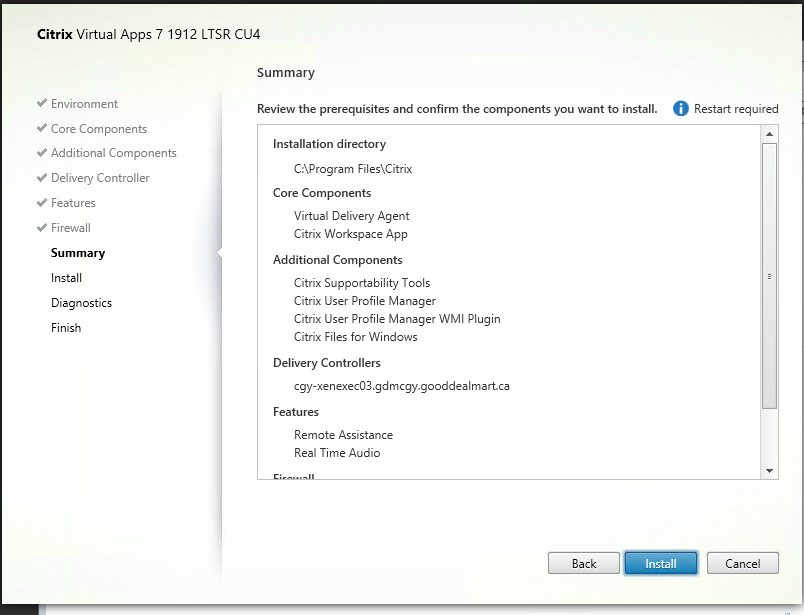
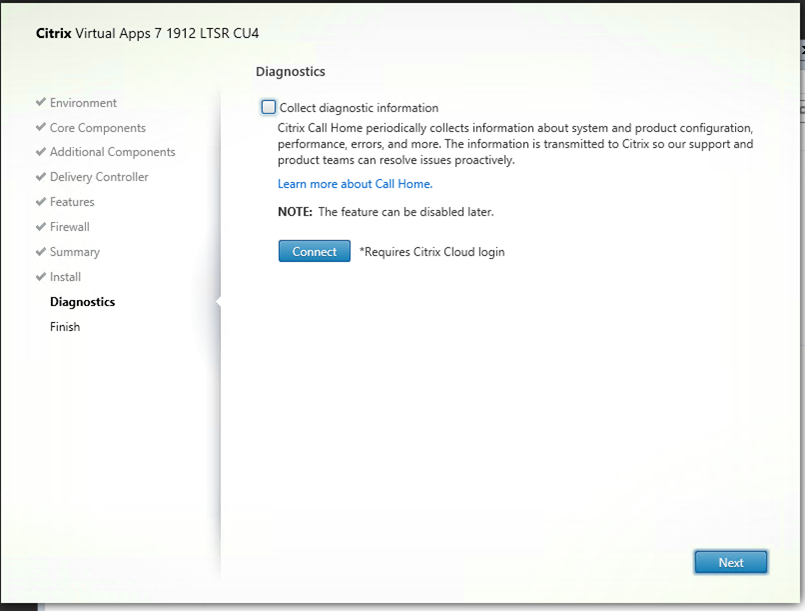
46. On the Diagnostics page, unselect Collect diagnostic information, click Next.
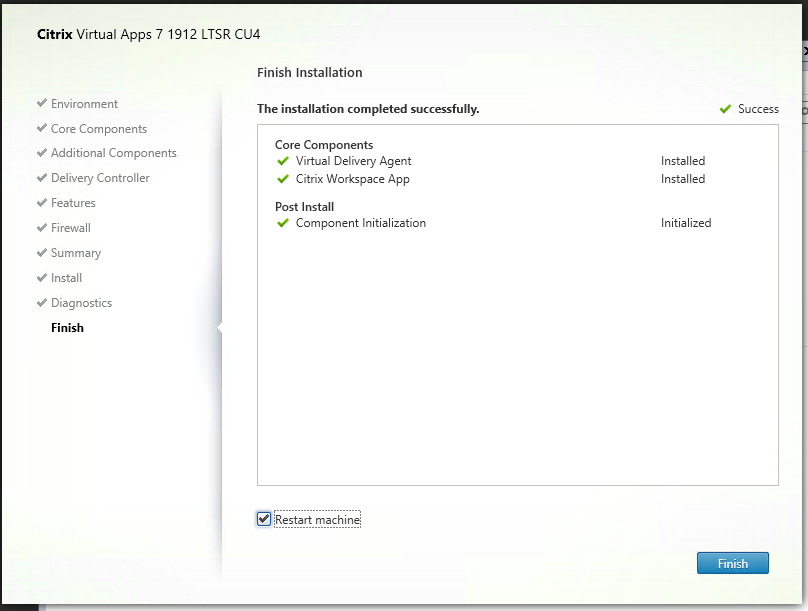
47. On the Finish Installation page, select Restart machine, click Finish.
48. Login to Citrix Virtual Apps Delivery Controller server.
49. Open Citrix Studio.
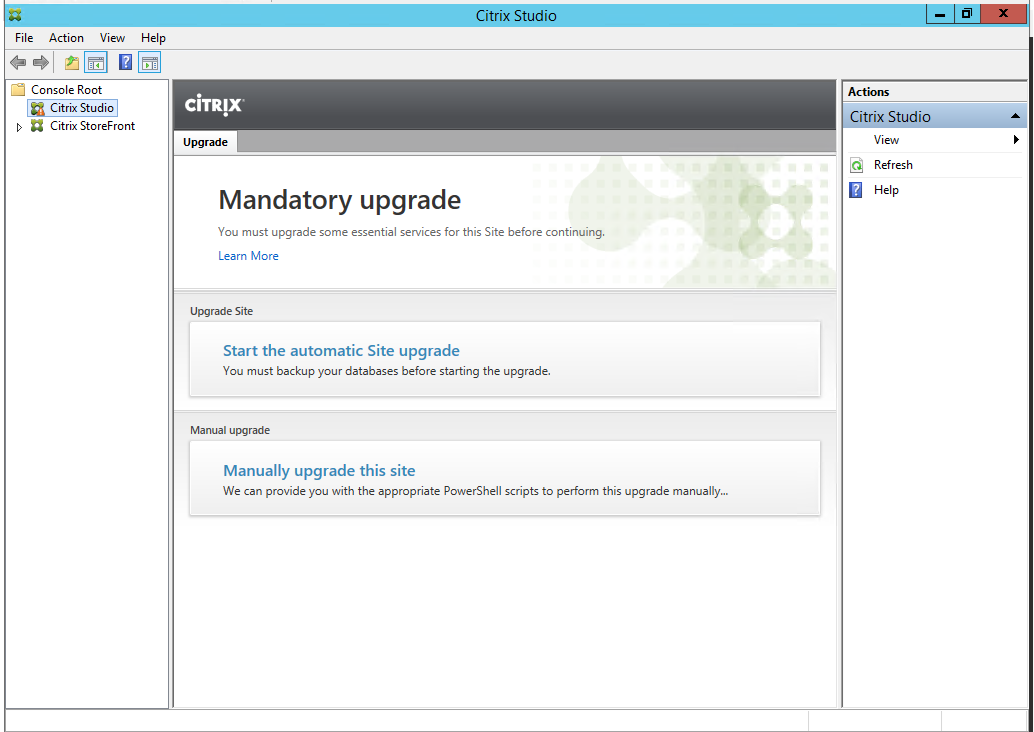
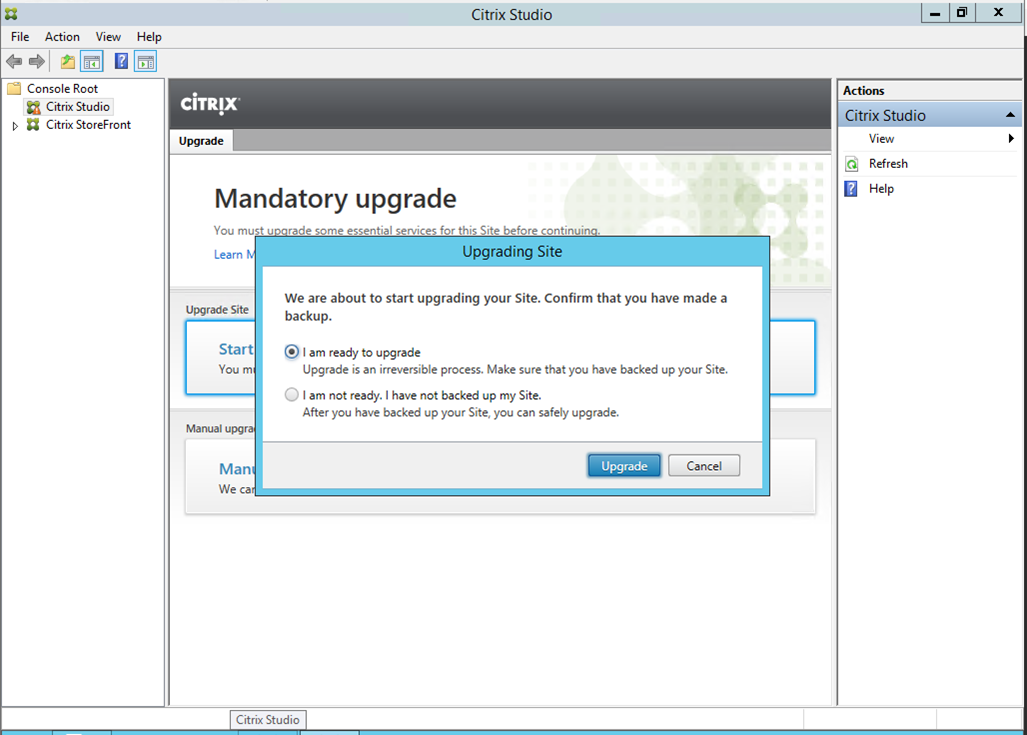
50. On the Citrix Studio, select Start the automatic Site upgrade.
51. On the Upgrading Site page, select I am ready to upgrade, click Upgrade.
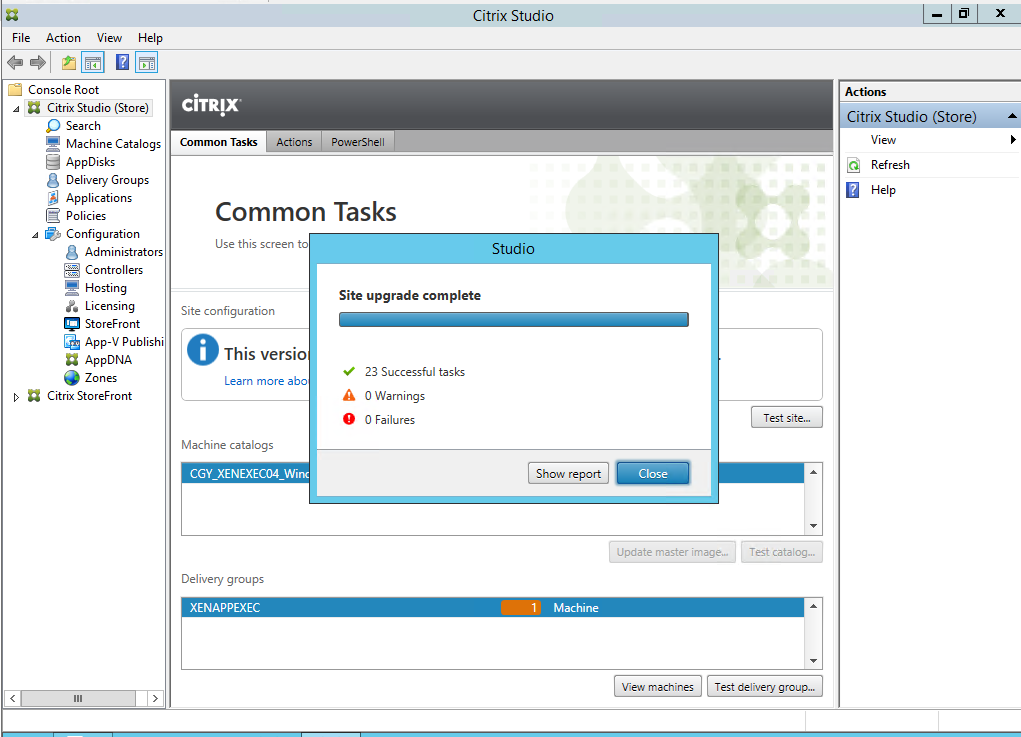
52. On the Studio page, make sure Site upgrade complete without issues, click Close.
53.Reboot Both Citrix servers.
Hope you enjoy this post.
Cary Sun
Twitter: @SifuSun
Web Site: carysun.com
Blog Site: checkyourlogs.net
Blog Site: gooddealmart.com
Author: Cary Sun
Cary Sun has a wealth of knowledge and expertise in data center and deployment solutions. As a Principal Consultant, he likely works closely with clients to help them design, implement, and manage their data center infrastructure and deployment strategies.
With his background in data center solutions, Cary Sun may have experience in server and storage virtualization, network design and optimization, backup and disaster recovery planning, and security and compliance management. He holds CISCO CERTIFIED INTERNETWORK EXPERT (CCIE No.4531) from 1999. Cary is also a Microsoft Most Valuable Professional (MVP), Microsoft Azure MVP, Veeam Vanguard and Cisco Champion. He is a published author with several titles, including blogs on Checkyourlogs.net, and the author of many books.
Cary is a very active blogger at checkyourlogs.net and is permanently available online for questions from the community. His passion for technology is contagious, improving everyone around him at what they do.
Blog site: https://www.checkyourlogs.net
Web site: https://carysun.com
Blog site: https://gooddealmart.com
Twitter: @SifuSun
in: https://www.linkedin.com/in/sifusun/
Amazon Author: https://Amazon.com/author/carysun
