Hello there GDM fans and today we are going to be talking a lot more about Hyper-V servers! Basically, we are going to be talking a little bit more about the kinds of disks and snapshots. You may be wondering what differencing disk deployment and snapshots are so let me tell you! A snapshot is basically a save file for your virtual machine so let’s say you accidentally get this really annoying virus on your computer and then just POOF revert it back to a previous snapshot and it just removed the virus faster than The Flash can run! So now differencing disk deployment, is basically a really fast way to duplicate your virtual hard drives so you can deploy them servers faster just like sonic! Oh boy this blog is all about speed and I like it! Now let me explain about the virtual hard disks first, so the first kind of virtual hard disk is a VHD file and that is basically a hard drive with a fixed amount of space inside of it! A second type a hard disk is a dynamic hard disk, that is a hard disk that starts small and then grows when it is needed! It is pretty useful if you don’t have enough space for a lot and you decide to clean up space slowly or you just don’t use your virtual machines storage very much. But just like everything else, this has one consequence, you cannot let the storage go up too high which is about over 80-100 GB and that is basically that maximum storage that this Dynamic disk can hold. The third and final type of VHD is a differencing kind of VHD, this is a VHD file that relies on another VHD file’s base and only stores the differences that it makes. Here is the consequence as always, if you change anything at all from the base disk, the differences on the disk would become invalid and be lost forever (maybe). Another thing you can do with differencing disks is that you can just create only one base virtual disk and then have a bunch of differencing disks building off of it and you may be asking what this might be great for and there are a lot of benefits from this! Just like testing out service packs, updates etc.
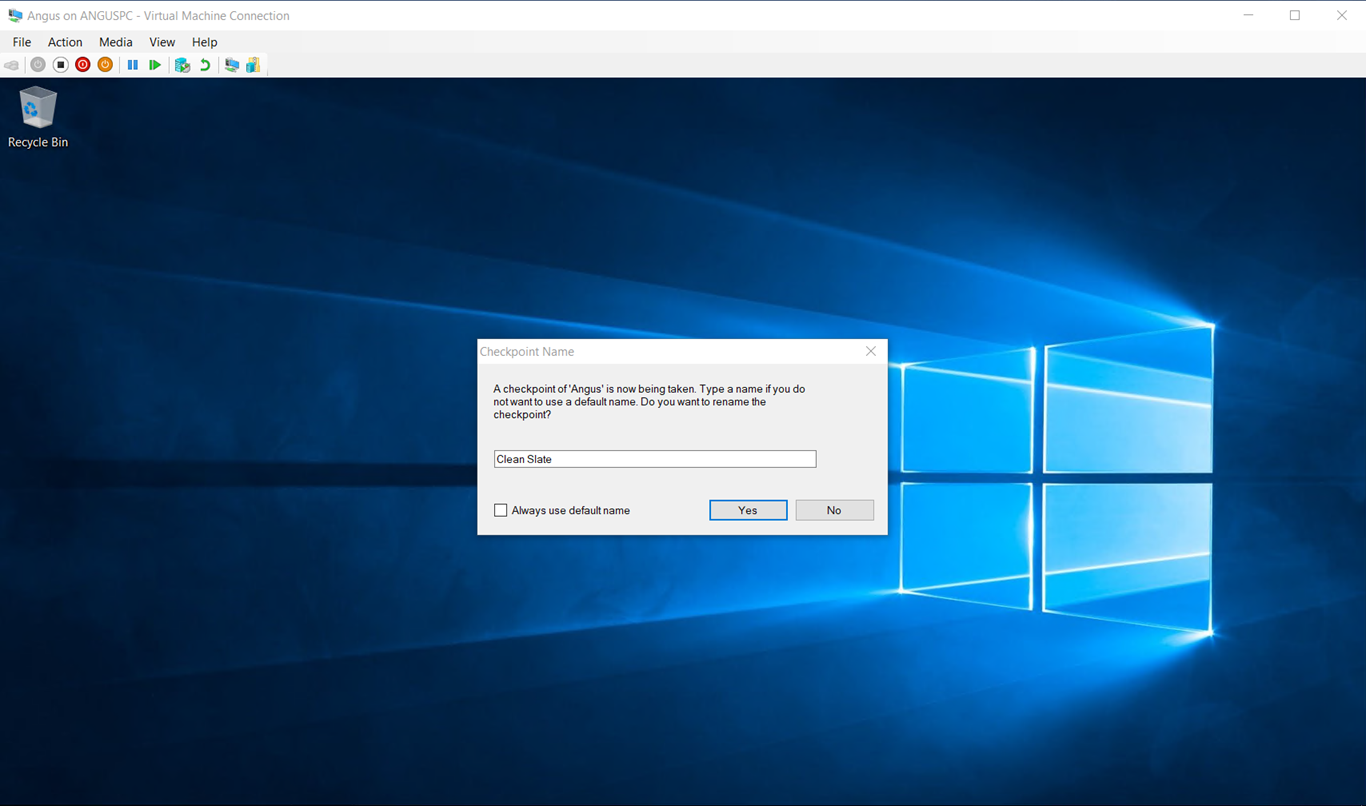
In case you were wondering, to take a snapshot now it is called checkpoint but both of them are the same thing all you have to do is just press a button and name it! It is as easy as that, if you want some pictures to help you, here you go.

Press on that button which is on top of the Virtual Machine

Now you can name your Checkpoint and you are done! Easy as that, if you were also wondering how to activate a checkpoint then this is how you do it.
Close out of your Virtual Machine

Right click, press Apply open up your Virtual Machine and you just went back in time in a matter of seconds! Anyways I hope you guys enjoyed this brief explanation blog and I will be seeing you all later!
To be continued…?
Twitter: @FrostedFright
Author: Angus Sun
Angus is excited to learn as much as he can about Microsoft and
other technologies. The one thing he likes is computer programming and technical writing. He also likes playing video games whenever he has spare time. Other than that, he just spends time writing blogs and creating videos.
